
welcome to ict 9.
course essentials.
|
|
|
| ||||||||
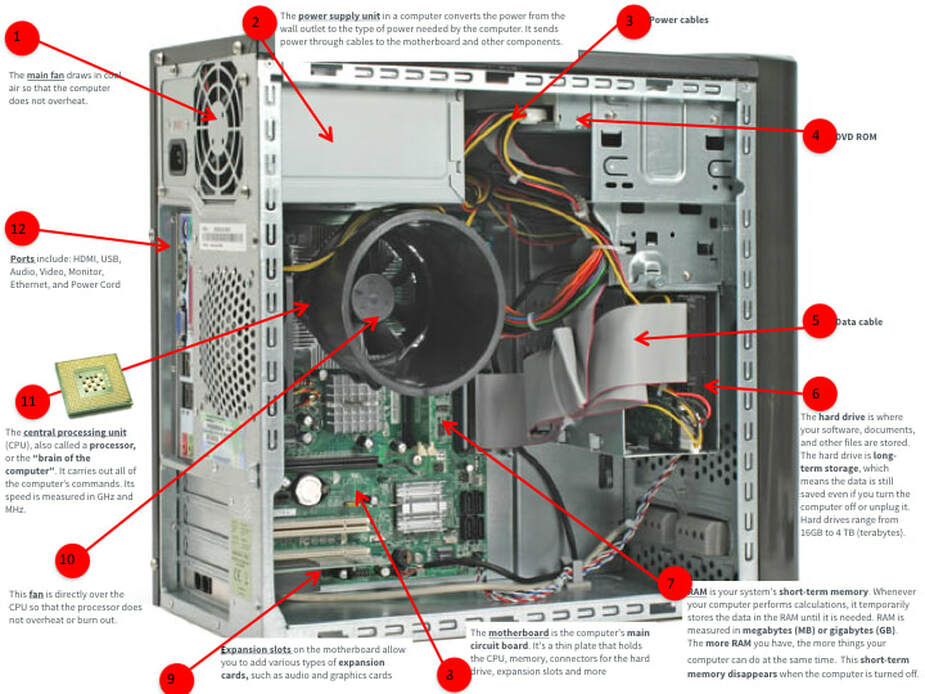
computer hardware unit
in-progress
|
|
|
|
coding unit
complete
sphere reflection.
|
1. With regards to coding your Sphero, what areas did you find the easiest to accomplish?
2. What areas of coding your Sphero did you find the most difficult? 3. Explain how you could use this technology outside of the classroom? How could you use a simple robot? 4. How well did you work with your group. Explain how you contributed to your group. |
| ||
sphero assignment 1: time/speed & polygon/angles
sphero vocabulary
Click on the sphero vocabulary in order to get an in-depth understanding of what each block means.
|

| ||||
assignment 1: scratch game
For this first assignment you are to create a mini game that one of your peers will play and evaluate. You are to fill out the following
| ICT 9- Mini Video Game |
|
|
|
|
|
|
from assignments and projects that are listed above this section will be incorporated in your term 2 report card (as well as your final illustrator project)
illustrator
complete
final illustrator project.
| ICT 9 - Final Illustrator Project |
last assignment in Ai.: perspective tool
https://design.tutsplus.com/tutorials/create-a-shimmering-cityscape-in-perspective-using-illustrator-cs5--vector-4442
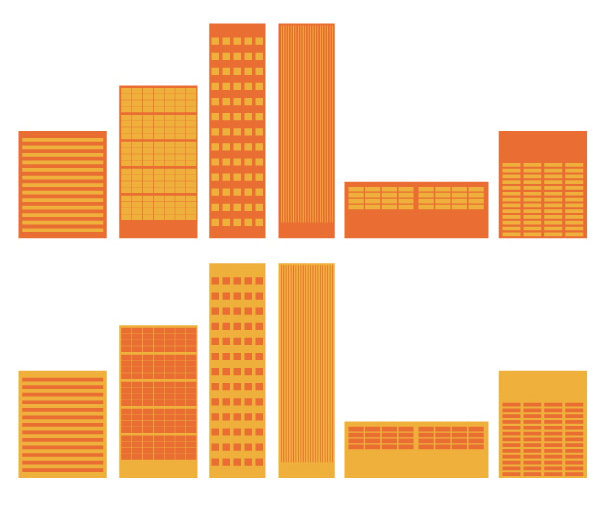
In this assignment. You will be playing with the infamous "perspective tool" you will be creating a series of buildings (4 minimum) with windows and doors in this lab.
1. Start by opening up a new document- doesn't matter the size.
2. Click on the perspective tool. This will give you the infamous "grid" that always appears randomly on your screen when you least expect it!
3. You will notice that there is a widget up in the top left corner- this widget is very important when it comes to using your shapes on the grid.
4. Build your first building using just the perspective tool.
5. Create your next few buildings in another document that are made with simple shapes like the image 2 down below. Use your shape tool! Once you have create a building with windows. Highlight all items on the building and group them. (right click and group)
6. Once you have created your images, open the symbols window by going to WINDOW > make sure symbols is checked off.
7. Drag and drop your grouped buildings into that panel.
8. Once you have dropped your images into the symbol panel you will begin to add them into your perspective grid. In order for you images to snap to grid, you have to make sure that you drop the building into the side that is highlighted on your widget.

|
|
assignment 2: typography art
|
In this assignment you will be working with text and typography. Use your knowledge from previous assignment and labs to make your masterpiece. Attached is a step by step guide for you to reference and your requirements for this assignment.
|
|
| ||||
step 1
step 2
step 3
lab 1: working with font
Make 10 combinations of fonts in the same category of type, but different font families to combine conflicting fonts.
Make 10 combinations of fonts in the same font family from the “character” option to combine concordant fonts.
Make 10 combinations of fonts in different categories of type and use other techniques to combine contrasting fonts.
Make 10 combinations of fonts in the same font family from the “character” option to combine concordant fonts.
Make 10 combinations of fonts in different categories of type and use other techniques to combine contrasting fonts.
|
|
|
|
assignment 2: cartoon tracing.
| ICT 9- Cartoon Tracing |

lab 1: halloween costume contest poster.
|
Steps to completing this assignment.
Step 1: Start by creating a rough draft of your Halloween Monster using your shape tools. Step 2: Create some sort of background on another layer using your shapes and pen tool. Step 3: Add the following text somewhere on your poster that is legible. "Windsor Annual Halloween Costume Contest. Where? Duke's Den. When? October 31. Bring your best costume and bring your cheering voice to cheer on your favourites!" Step 4: Create some sort of boarder by exploring your paint brushes library. 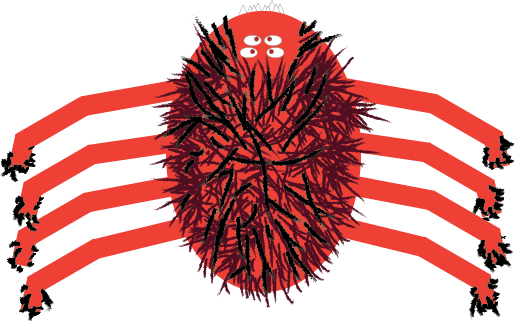
|

|
social media & ethics
in-progress
linkedin.
| Best Practices LinkedIn |
social media presentation.
|
|
| ||||||
are you social media smart?
|
|
| ||||||
